
from http://twitter.com/Corbinm3
HP printer? Update the firmware: https://t.co/MIVLgPpHHM This vuln allows hackers to compromise the firmware with their own.
Hacked in Translation – from Subtitles to Complete Takeover. New exploit in media players w/ subtitles. #TechTweets https://t.co/isZMAXRFn1
from http://twitter.com/Corbinm3
Hacked in Translation – from Subtitles to Complete Takeover. New exploit in media players w/ subtitles. https://t.co/isZMAXRFn1
Samba exploit – not quite WannaCry for Linux, but patch anyway! #TechTweets https://t.co/6hVUhiuUFh
from http://twitter.com/Corbinm3
Samba exploit – not quite WannaCry for Linux, but patch anyway! https://t.co/6hVUhiuUFh
Chipotle says ‘most’ of its restaurants were infected with credit card stealing malware 3-24 to 4-18 #TechTweets https://t.co/rS5APV4j1R
from http://twitter.com/Corbinm3
Chipotle says ‘most’ of its restaurants were infected with credit card stealing malware 3-24 to 4-18 https://t.co/rS5APV4j1R
Hackers gained access to OneLogin, can’t rule out possibility that hackers got keys encrypted data. #TechTweets https://t.co/d3OfK31kVs
from http://twitter.com/Corbinm3
Hackers gained access to OneLogin, can’t rule out possibility that hackers got keys encrypted data. https://t.co/d3OfK31kVs
WannaCry: Two Weeks and 16 Million Averted Ransoms Later #TechTweets #ransomware https://t.co/lBASsvbOuZ
from http://twitter.com/Corbinm3
WannaCry: Two Weeks and 16 Million Averted Ransoms Later #TechTweets #ransomware https://t.co/lBASsvbOuZ
Installing WordPress on Microsoft IIS
Install Internet Information Services 8.5 and WordPress 3.x by Using the Microsoft Web Platform Installer 5.0
This article describes how to install and configure WordPress 3.x on Windows clients and servers (see Prerequisites) using the Microsoft Web Platform Installer (Web PI) version 5.0. As of May 28, 2014, the latest version of WordPress is 3.9.1.
The Web PI is a free tool that makes getting the latest components of the Microsoft Web Platform—including Internet Information Services (IIS), MySQL, PHP, the Microsoft .NET Framework, and Visual Web Developer—quick and easy. The Web PI also lets you install web applications such as WordPress with the built-in Windows Web App Gallery.
To install WordPress on IIS 8.5 by using the Web PI 5.0, follow these steps:
Step 1. Install Microsoft Web Platform Installer 5.0
Step 2. Select the products and applications to install
Step 3. Review and configure the selected products and applications
Step 4. Complete the installation and configuration
Step 5. Enable clean URLs (Pretty Permalinks)
Step 6. Running Microsoft WebMatrix with WordPress
Prerequisites
The supported operating systems for the Microsoft Web Platform Installer (Web PI) 5.0 are Windows 8.1, Windows 8, Windows 7, Windows Vista Service Pack 1 (SP1), Windows Vista, Windows XP Service Pack 2 (SP2) and later versions, Windows Server 2012 R2, Windows Server 2012, Windows Server 2008 R2, Windows Server 2008, and Windows Server 2003 Service Pack 1 (SP1) and later versions.
For this guide, it is assumed that you have either Windows Server 2012 R2 or Windows 8.1 Pro client installed on your computer. You will also need an Internet connection and administrator privileges for your computer.
It is a good idea to confirm that your system meets the hardware requirements for IIS 8.5. See http://technet.microsoft.com/en-us/library/dn303418.aspx for more information.
Step 1. Install Microsoft Web Platform Installer 5.0
In this step you download, install, and launch the MS Web Platform Installer (Web PI 5.0, which is a 1.4 MB download).
- Log into your Windows machine as a user with administrative privileges.
- Launch Internet Explorer (other browsers work too).
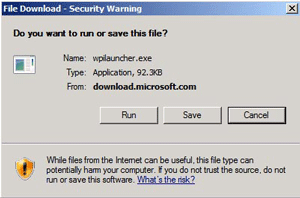
- Go to http://www.microsoft.com/web/downloads/platform.aspx, and then click the Free Download button.

- Click Run.
- Click Run again.
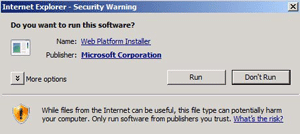
- Wait a few seconds for the Web PI 5.0 to start.


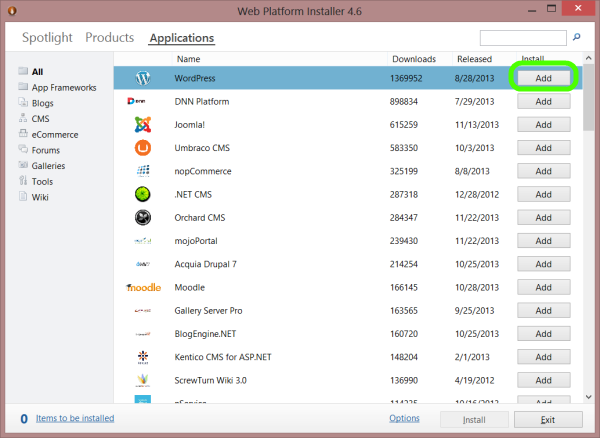
Step 2. Select the products and applications to install
In this step, you select the version of WordPress that you want to install. WordPress 3.9.1 is used in this guide.
- On the “Web Platform Installer” start screen click the Applications tab, and then click the Add button associated to the right with “WordPress”.
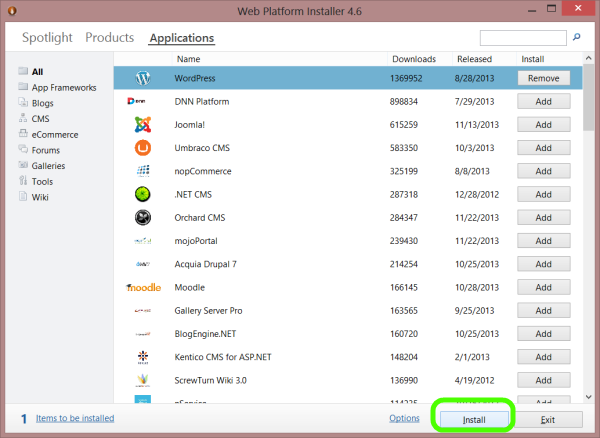
- Click Install.


Step 3. Review and configure the selected products and applications
In this step, you review and configure what you have added. Additionally, you add the database and configure the password for it.
- When you are asked which type of database you want to use, leave MySQL (Not installed) selected.
Note: This will install MySQL 5.1 for Windows to handle all the database transactions that are required by WordPress. - In password fields, type in a password for your database, and then click Continue.

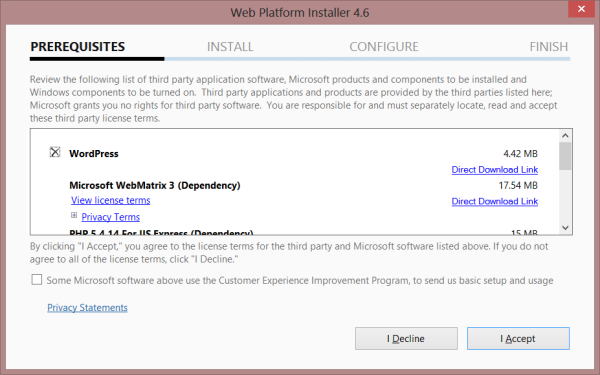
- Review the files to be downloaded and installed, as well as the license agreements, and then click I Accept.
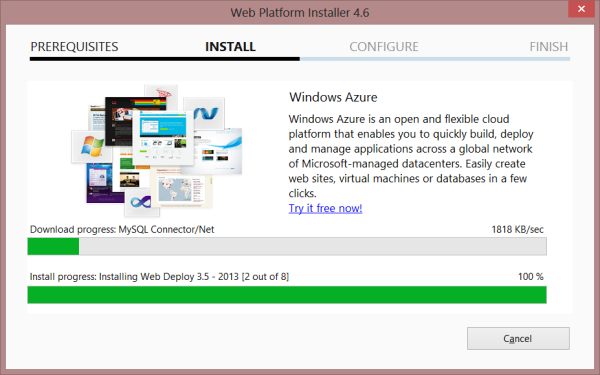
- Allow the Web PI installation to complete.
- Configure Security Keys.
The WordPress Security Keys section describes what these keys and how they’re used.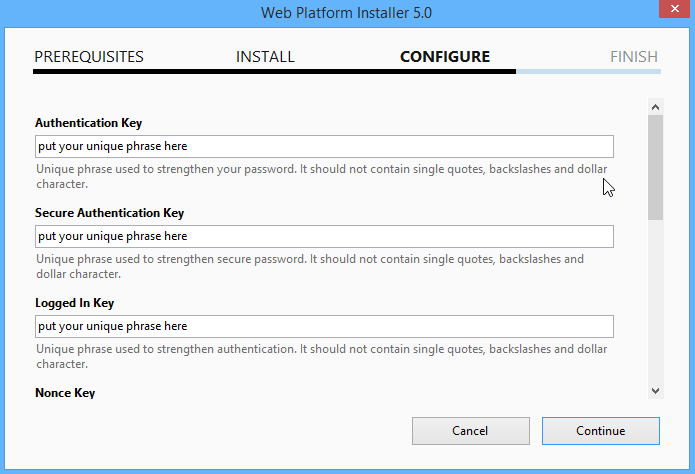
The keys don’t need to be remembered, they should just be long, random and complicated. An easy way to generate the keys is to use the online key generator. Each time you click browser refresh, the online key generator creates a new set of keys.Note: The online key generator produces keys that may contain dollar signs (‘$’) which cannot be used with keys entered into Web-PI. Until this Web-PI issue is resolved, a simple solution is to check for dollar sign characters and simply replace ‘$’ with ‘S’ (any alpha character will work).Here’s an example set of keys – don’t use these, use the online key generator to create your own unique keys!

- Finish.
On the FINISH dialog click the copy to clipboard link (this copies your database settings and password to the clipboard), paste and save this information in a file for future reference, and then click the Finish button.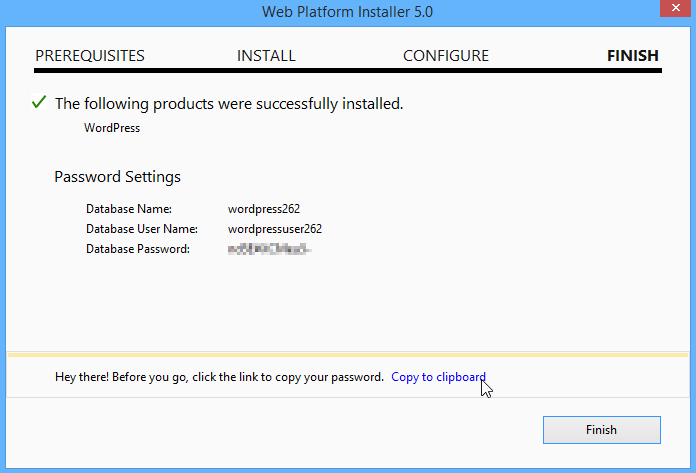
- Microsoft WebMatrix will open, allowing you to configure additional settings related to your WordPress site:


Step 4. Complete the installation and configuration
In this step, you complete the installation.
- Switch to Internet Explorer.
- Go to your WordPress website. For example, go to http://localhost/myWordPress.
- In the Site Title box, type the name of your site.
- In the Password, twice boxes, type a password for the admin account.

- In the Your E-mail box, type the email address for the admin account.
- Click Install WordPress.

- Click Log In.

- Type admin, type the password, and then click Log In.


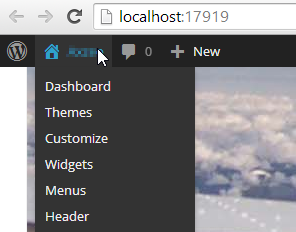
Step 5. Enable clean URLs (Pretty Permalinks)
In this step, you enable Pretty Permalinks now that WordPress has been installed.
- In the Dashboard menu, click Settings.

- Scroll down, and then click Permalinks.

- Under Common settings, select a common Permalink setting or select Custom Structure to create your own Permalink, and then click Save Changes.


The installation is now complete, and you are ready to use WordPress!
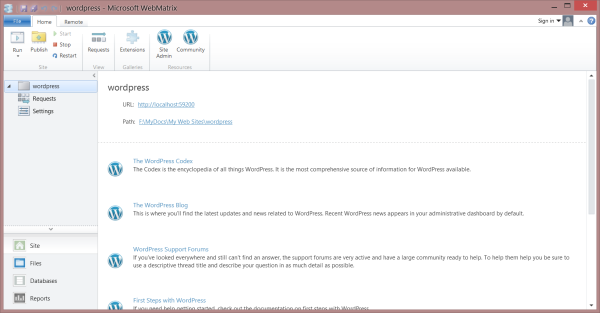
Step 6. Running Microsoft WebMatrix with WordPress
The Microsoft Web Platform Installer (Web PI) installs WordPress to run in a localhost configuration in combination with Microsoft WebMatrix (which was also installed as part of the Web PI installation). When WebMatrix is not running (e.g., after a reboot or if you terminate WebMatrix) you will not be able to access your localhost WordPress site until WebMatrix is restarted. Use the following steps to start WebMatrix and launch your localhost WordPress site.
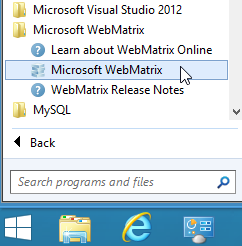
- Click Start, click All Programs, click-open the Microsoft WebMatrix folder, and then click to launch the Microsoft WebMatrix app.
- On the WebMatrix start page, click the My Sites button to display the installed sites, and then click your wordpress site that displays in the pop-up context menu.

- After the site opens, click the lower-left Site tab to display links for the WordPress launch URL and file Path.

- Click on the site URL link to launch your localhost WordPress site.

- At this point WebMatrix will open a browser window to your localhost WordPress site which you can customize and add content to.


Remember: WebMatrix must be left running while you interact with your localhost WordPress site.
Taken from: https://codex.wordpress.org/Installing_on_Microsoft_IIS
Event ID 15021, HTTPEvent “error occurred while using SSL configuration for endpoint 0.0.0.0:444″ – Exchange Server 2013
Event ID 15021, HTTPEvent Error An error occurred while using SSL configuration for endpoint 0.0.0.0:444 – Exchange Server 2013
Error Decription:
An error occurred while using SSL configuration for endpoint 0.0.0.0:444. The error status code is contained within the returned data.
You will find the multiple events are thrown every minute with similar description.
This is a common error I observed in Exchange Server 2013. You will observe the all or few of the following,
1. Exchange Administration Center (EAC) returns blank page
2. The OWA allows login, but returns blank similar to EAC result
3. Outlook or any other Exchange Clients will fail to connect.
4. Exchange Management Shell Fails to connect.
This happens, I suppose, due to the usage of non-existed certificate. I have verified the ID of the certificate in question with the available certificate in my SSL store, however I did not find the one which was assigned to 0.0.0.0:444.
How to Fix:
1. View the certificate binding, and identify and delete the certificate assigned to IP:Port
2. Assing (Add) a valid certificate to it which is used by IP:Port 127.0.0.1:443.
Procedure:
Open Command Prompt (because EMS is broken)
1. Run “netsh http show sslcert”
Note down the Certificate Hash and Application ID of the certificate assigned to IP:Port 127.0.0.1:443.
2. Run the below command to delete certificate assigned for IP:Port 0.0.0.0:444
netsh http delete sslcert ipport=0.0.0.0:444
3. Run the below command to add the noted certificate to ipport=0.0.0.0:444
netsh http add sslcert ipport=0.0.0.0:444 certhash=1234ed434 appid=”{1010101010}”
Note – replace the certhash and appid with the value noted earlier.
Wait for a while, and you will no longer observe the error events in the Event log and the Exchange will start functioning as normal. It is recommended to take a restart of the server post these changes.
ActiveSync Fails to Deliver E-Mail to Phones after Database Repair – Event ID 1008
We ran into an issue where an exchange server was down due to a full VM crash. We had to restore the server from a backup. After the backup was all up and running emails started flowing again. However, we also were notified that people were no longer receiving emails on their mobile devices. We also noticed that what started to happen were critical and error events to the application log. While most appeared to be transient and would likely cure themselves – they did – one did not. Event ID 1008. Here is an excerpt from the description:
Description:
An exception occurred and was handled by Exchange ActiveSync. This may have been caused by an outdated or corrupted Exchange ActiveSync device partnership. This can occur if a user tries to modify the same item from multiple computers. If this is the case, Exchange ActiveSync will re-create the partnership with the device. Items will be updated at the next synchronization.
URL=/Microsoft-Server-ActiveSync/default.eas?User=xxxxxx&DeviceId=Appl70111HXKA4S&DeviceType=iPhone&Cmd=SendMail
— Exception start —
Exception type: System.Web.HttpException
Exception message: An error occurred while communicating with the remote host. The error code is 0x800703E3.
Note in particular the line beginning with “URL=/”. The user name of the mailbox owner appears and it is their phone that is not syncing properly. In my particular case, the users could send email from their phones but not receive . Of course in this instance, only two users were effected: the owners of the company!
What Didn’t Work
The first thing I had them do was to delete the Exchange email account from their iPhones and re-add it. It was a real test to see if they could accomplish this on their own. Happy to say they did, sad to say it re-added the account and folders but still didn’t allow the phones to receive email.
Time for harsher measures, so I opened Exchange Management Console and expanded the Recipient Configuration and select Mailbox. Then I selected one of the users and from the Actions pane on the right, I selected Manage Mobile Phone. The following wizard appeared:
 EMC Recipient Mobile Phone
The wizard background didn’t appear pink, but you get the point.
Notice that the radio button “Remove mobile phone partnership” is selected. I completed the wizard by clicking on the Remove button, and felt very pleased. I allowed for about an hour to pass to have Exchange and ActiveSync re-establish the partnerships. After three hours, I figured that trick was not going to happen.
What Did Work
The trick that did work was pretty straight forward. Here’s what I did:
- Open EMC and expand Organization Configuration.
- In the right hand action pane, select New Mailbox Database.
- Complete the wizard to create a new mailbox database and mount it.
- In EMC, expand Recipient Configuration and select Mailbox.
- Select the user(s) whose phones are not syncing.
- In the right hand action pane, select New Local Move Request.
- Complete the wizard to move the mailboxes to the new database created in the previous steps.
- In the EMC navigation pane on the left, click on Move Request and follow the progress of the mailbox move(s). NOTE: you can double-click on a mailbox and the properties will display the size of the mailbox and the percent complete. It does not refresh so close it and re-display as needed.
Just as soon as the move(s) were complete, email flow to the phones was re-established.
Will ActiveSync Still Work if You Move Them Back?
Yes, after testing, it worked just fine.
All credit goes to: https://lhdinger.wordpress.com/2012/04/10/activesync-fails-to-deliver-e-mail-to-iphones-after-database-repair-event-id-1008/
Reduce Sharepoint Services log.ldf Files
I had the problem that Sharepoint_Config-ID-.log.ldf grew really BIG (14GB) on a content database of 1 GB!
This caused issues where the log was taking up all the available free space on the server, not OK!
You can solve this problem by using “Shrink” command in the MS SQL Server Management Studio Express
First you need to connect to your Sharepoint 3.0 database called: \\.\pipe\mssql$microsoft##ssee\sql\query – just put this string in your “Server name” field:
\\.\pipe\mssql$microsoft##ssee\sql\query
Create full backup of all databases before continuing!
After that we should change restore mode from “Full” (this the parameter that allows .log.ldf to grow that large as transaction logs are not purged) to “Simple”:
Expand Databases, right mouse click on Sharepoint_Config… Properties, Options, Recovery model: Simple and click OK
Shrink the database procedure:
Expand Databases, right mouse click on Sharepoint_Config… Tasks, Shrink, Files in File type select Log and click OK
Your log file will become radicaly smaller. 🙂
Be sure you backup your databases before this procedure and also on a daily basis…
Good luck!
Also check:
http://geekswithblogs.net/RogueCoder/archive/2008/06/03/122588.aspx
http://www.karaszi.com/SQLServer/info_dont_shrink.asp
All credit goes to: http://luka.manojlovic.net/2008/06/15/reduce-sharepoint-services-30-logldf-files/